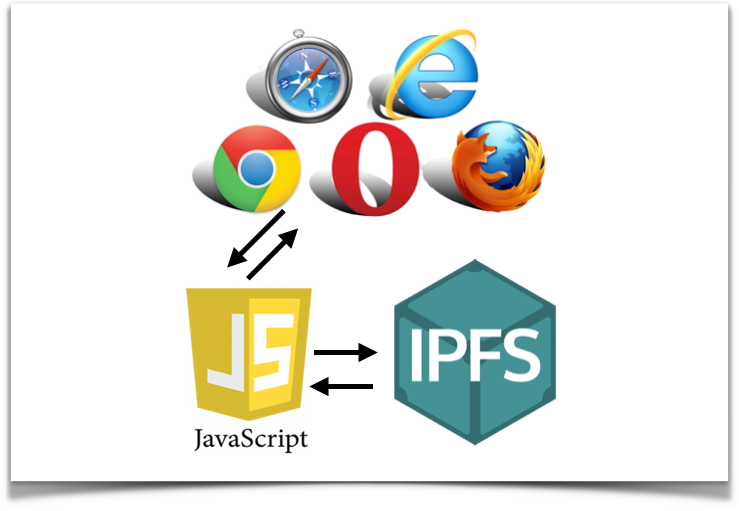
We have learned how to share your files via IPFS. Also, we have learned how to host a static website on IPFS. However, if you want to make your own application to interact with IPFS it’s not enough. In this article, we’ll learn how to interact with IPFS by javaScript programming language.
Environment Setup
Make sure you have node.js and npm on your computer. After you install node.js and npm, you should see your node and npm version by
“$ node -v && npm -v”

Now create your work directory and install “ipfs” node module inside the directory.
“$npm install ipfs”
It took few minutes, you’ll see a node_modules directory after you install the module.


Interact with IPFS by javascript
Way to interact with IPFS is by using “require(‘ipfs’).create()”
const IPFS = require(‘ipfs’)
async function main () {
const node = await IPFS.create()
// Your Codes…
}
main()
Interact with IPFS by javascript
Let’s make an example to push a “Hello IPFS!” content on IPFS. Create a file named “app.js” in the working directly. You can add content on IPFS through “add”.
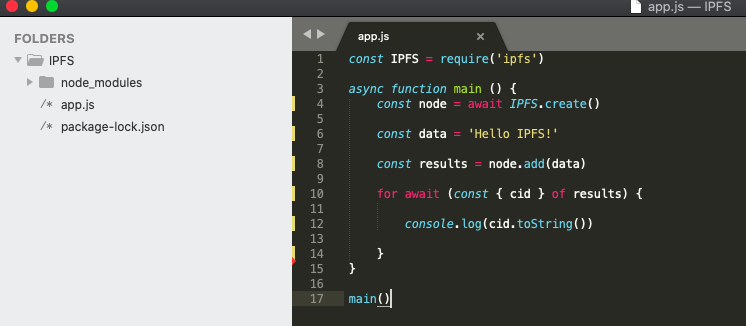
Command
“$node app”
You can get your CID for the content.

Let’s check the content through IPFS gateway.

Also, we can retrieve data with a cid using “cat”. Make another file named “app2.js”.
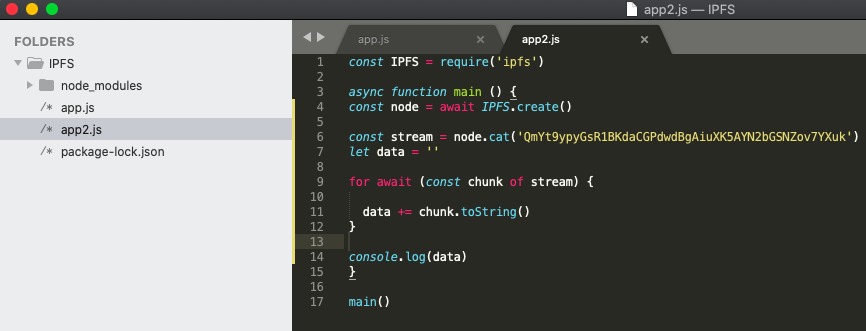
Run “$node app2” you get the content from the cid now!

Make an application to interact with IPFS
You already know how to interact with IPFS by using javascript above. Let’s make an application to interact with IPFS. IPFS have examples on Github to teach you to make your applications.
Copy files from js-ipfs github into a new working directory. ( You can use “$git clone …” if you have git on your computer. )
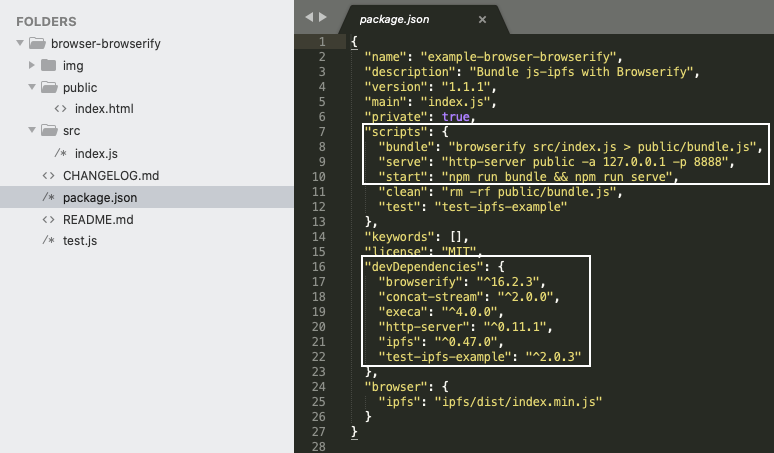
Check the package.json file. In the “devDependencies”, it means we’ll install these node packages when we run “$npm install”.
And in the “scripts”, we see
“start”: “npm run bundle && npm run serve”,
“serve”: “http-server public -a 127.0.0.1 -p 8888”, and
“bundle”: “browserify src/index.js > public/bundle.js”.
It means when we run “$npm start”we will run “bundle” and “serve”.
Running serve, we will make an HTTP server with path “public “on the port “8888”. Running bundle, we will convert src/index.js into public/bundle.js for browser to load.
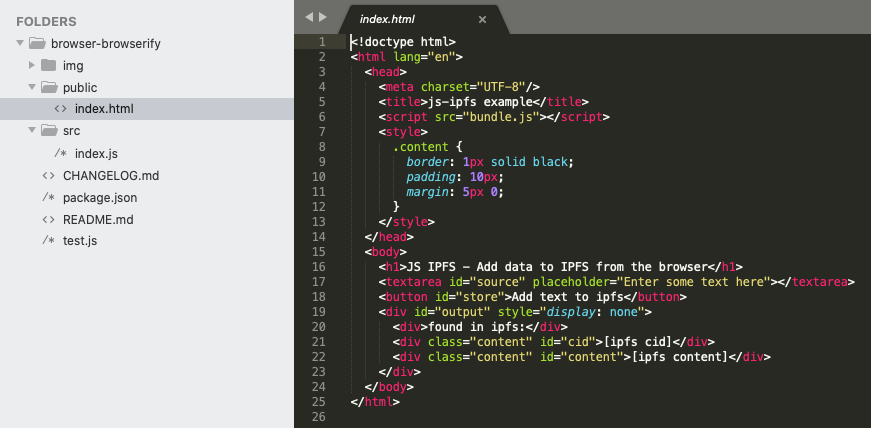
Let’s check file “public/index.html”. Check line 6, it will render the bundle.js. (Converted from index.js). Also, we can check line 17/18/19/21/22 with id source/store/cid/content. We’ll see what the index.js will do for elements with these ids.
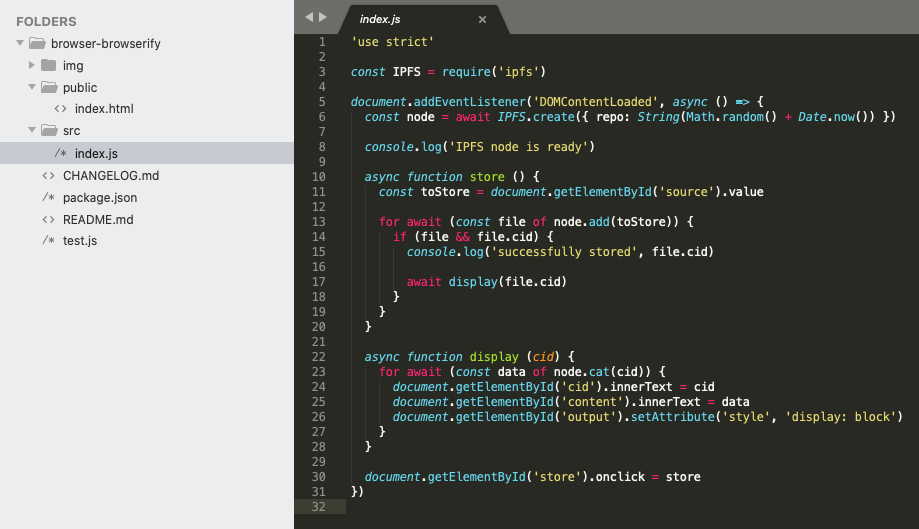
Let’s take a look at the index.js file. Line 10 is a function, it define “toStore” value from element “id: source”(line 11). Line 12 adds “toStore” to IPFS, and get file value. Line17 will transfer the prop “file.cid” to function “display”
Line 22 define the function display to retrieve IPFS data with cid( line 23), put cid on element “id:cid” ( line 24) and data on element “id:content” ( line25).
Line make the event when we click the element “id: store” to make store function (line 10) happen.
Run the application
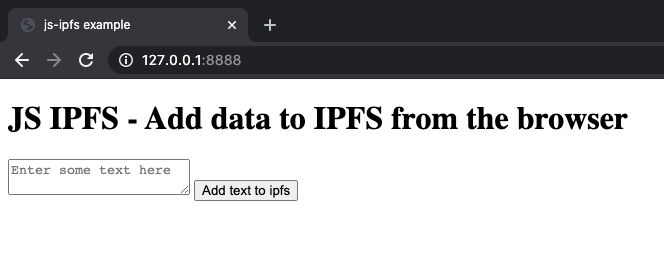
Anyway, let’s run “$npm install && npm start”, it take few minutes. (We only need to run “$npm start” for the 2nd time since we already install node packages.) We can see the application is ready on http://127.0.0.1:8888, let’s check it!

Let’s try to add content “Hello IPFS!” on IPFS.
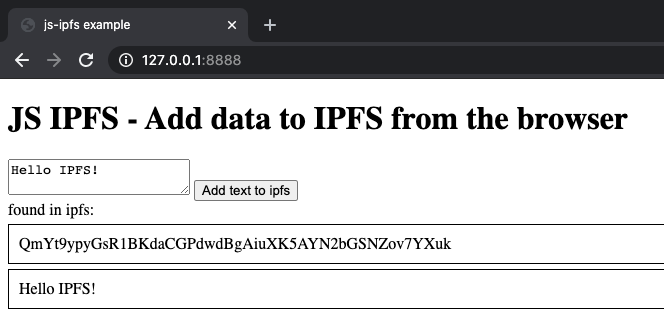
Note that you got the same cid in the session “Interact with IPFS by javascript” since we have the same content.
Now, you have your first application to interact with IPFS.
Read More
IPFS for Beginners – Storing Data in a Distributed Hash Table.
IPFS for Beginners – Host Your Static Website.
